Undo and Redo Functions
Studio lets you undo and redo project-level changes (for example, changing text in a Properties Grid field, creating a link on an automation, or deleting a control in Object Explorer). These functions do not apply to project-level changes (such as adding an adapter) or solution-level changes (such as adding a file).
You can choose the Undo and Redo buttons from the main toolbar:

These buttons are enabled when there has been a change that can be undone or redone. The shortcut keys Ctrl+z and Ctrl+y apply. Pressing Ctrl+z undoes the most recent change. Pressing Ctrl+y reapplies the last (undone) change.
Undo/Redo list of changes
Clicking the arrow next to either the Undo or Redo button lists the changes that can be undone or redone. For example, the example below shows the Undo options after the following changes have been made on an automation:
Variable design block moved
Data link changed to Sensitive
Event link changed to Asynchronous
Note that the changes are listed in reverse chronological order. In this case, to undo the first action, Move Connection Blocks, you must first undo the Asynchronous link change, then the Sensitive link change, and finally the Move Connection Blocks. You can select multiple changes to be undone or redone.
The changes listed in the Undo/Redo lists continue to grow as long as the Designer has focus on the project item. Referring to the list shown in the image above, this list will continue to grow as long as the automation is open in the Designer and changes are being made to the automation. This list stays intact even when the project item tab is not in focus in the Designer. However, closing the project item in the Designer clears the list of changes associated with the item.
Designer focus and Undo/Redo
The changes which can be undone or redone depend on the Designer tab in focus. For example, to undo the changes made on an automation, the automation must be in focus (active) in the Designer. When making changes in Object Explorer or on the Properties Grid, make sure the proper item active in the Designer. The following examples illustrate how the Designer, Properties Grid, Object Explorer and work together with the Undo/Redo functions.
Changes in the Properties grid
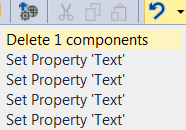
While making active changes in a property field, you can use Undo and Redo. For example, while in the Name property of a Label on a Windows Form. You type CRM1, backspacing over the 1, and type A. If you press Ctrl+Z, the text will return to CRM1. However, once you leave the property field, the only way to Undo the Name change is to make sure the project item is in focus in the Designer – in this case, the Windows form is open and in focus in the Designer. With the Window form open, the Undo change list will show all changes made to the Label as well as all controls on the form and the form itself. See the example below:
![]()
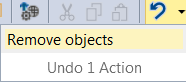
Changes in Object Explorer
To undo or redo changes made to controls in Object Explorer, make sure that the parent object, such as an adapter, is in focus in the Designer. For example, with an automation open and in focus in the Designer you delete a control in Object Explorer (the btnMPlus for the Calc.exe application). If you click on the automation, you will notice that the deletion is not listed in the Undo list. However, if you change focus to the Calc Windows adapter, the deletion is in the Undo list.